Logo Instruction Center
  • Login
  • Sign up
  • Forums
  • Store
  • Blog

Mini Guitar Amp

A Mini Guitar Amp Using The LM386 IC
Steps
  1. Overview
  2. Step 1: Drilling Holes
  3. Step 2: Installing Hardware
  4. Step 3: Building The Circuit
  5. Step 4: Insulation
  6. Step 5: Soldering Components
  7. Step 6: Rock Out!

Add To Favorites
Categories
DIY Projects, Learning Projects
Created by takide
Status: Active
7393af6088c4f20303cc19ad007f616e?s=30

Step 4: Insulation Step 5 of 7

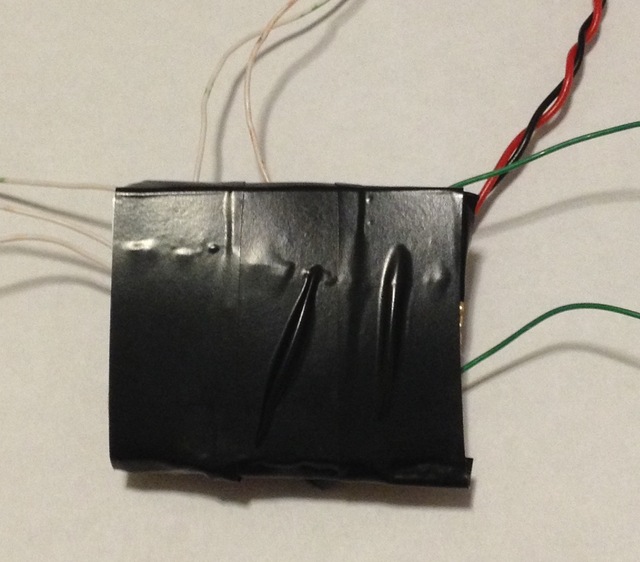
Before putting the amp together, it is wise to insulate the exposed electronics. I cut some paper and taped it to the back of the amplifier circuit to keep things from shorting out. 

Here is what my amplifier circuit looked like with the added insulation:

Img_3385

Next Page >>
<< Prev Page

Products

Pdip-8_154 LM386 LM386L Audio Power Amplifier IC

A-4117_2 Mylar Speaker 8 OHM 1W

A-870-a 9V 9-Volt Battery Clip / Connector Snap

R9d2kkft00f1_2 Rocker Switch Black ON/OFF DPST 6A 250VAC Panel Mount, Snap-In

A-1006_2 Boss Style Silver Top Black Knob 27mm

A-660_4 5mm Bezel LED Holder Chrome Metal

A-1123 6.35mm 1/4" Stereo Insulated Switched Socket Jack Solder Lugs

A-1554 LED 5mm Red Super Bright

Volume-solder_8_2 10K OHM Linear Taper Potentiometer with Solder Lugs

R-carbon5_873 470 OHM 1/2W 5% Carbon Film Resistor

Mylar-1_100 47nF 0.047uF 100V 5% Mylar Film Capacitors

A-4514-r_3 100uF 16V 105C Radial Electrolytic Capacitor 5x11mm

A-4518-r_3_3 10uF 100V 105C Radial Electrolytic Capacitor 6x11mm

2025 © Tayda Electronics