Featured Product: ESP8266 Wifi Module
ESP8266 ESP-07 WIFI Module: Connect to the IoT quickly, easily, and cheaply!
Welcome to the first Featured Products post. Here we are going to share some information on specific products that are available on Tayda Electronics. The goal is to educate electronic enthusiasts on some of the products that are availabe at Tayda Electronics.
Today we are going to checkout the ESP8266 in finer detail.
Have you heard of the internet of things? You know the one. The Internet where your coffee pot tweets, and your dog posts to facebook. Your kegerator keeps the local community updated on how many beers are being consumed at your home? How does that happen? How is the internet seemingly connected to everything nowadays?
Well there are a bunch of people that connect their everyday things to the internet utilizing low cost sensors. Some ways to connect so called "things" to the internet is utilizing:
- Arduino
- Raspberry Pi
- BeagleBone Black
- Particle Core or Particle Photon
- Tons of other so called IoT connected devices or development boards. The list is long.
Each of these boards is relatively expensive though. The photon is the only one of that list that comes already being able to connect to the internet and is available for $19. At Tayda we can connect to the internet for $2.59. You read that correctly $2.59! Utilizing the powerful, inexpensive, and arduino compatible ESP8266.
The ESP8266 is a very popular board and comes in many form factors. These are usually named as ESP8266 ESP-01 through ESP-11. As well as custom breakout boards available through Sparkfun, and Adafruit that are known as the Sparkfun ESP8266 Thing and the Adafruit Huzzah ESP8266 breakout board. These each cost about 10 bucks but are simply break out boards for the ESP8266.
Check out the ESP8266 on Tayda Electronics by clicking here.
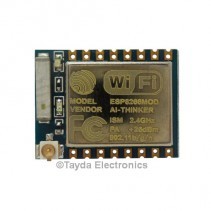
The version available at Tayda Electronics is the popular ESP8266 ESP-07. This includes 9 GPIO pins to communicate with lots of sensors, screens, or other attachments. Just about anything you can connect to an arduino, you can connect to this ESP8266.


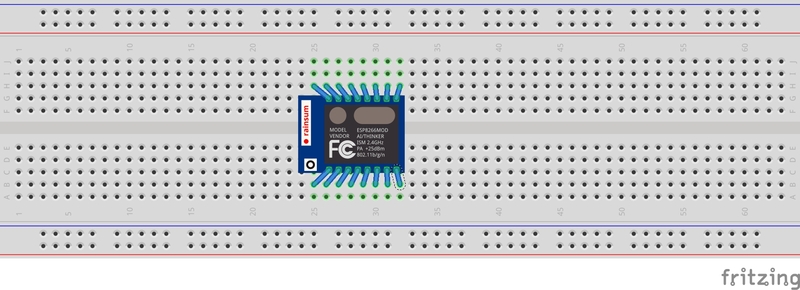
The ESP-07 at first seems like a strange form factor. The pins do not match standard breadboard pins outs. So it is a little difficult to breadboard. My current reccomendation is to solder on individual wires to each hole that are long enough to then connect to a bread board. You can see how I soldered mine below. When I started I didn't think I would need many pins, so I only soldered VCC, GND, ADC, TX, RX, GPI0, and EN. I ended up having to go back and solder almost every pin before I really got it working. So I would reccomend just soldering every pin from the beginning. I used solid core hook up wire and it seems to be working well. It's a little stiff but its pretty easy to use. The pins are pretty close together but I found soldering each wire to be extremely easy once you get going. The solder cups on this take solder pretty easily. Though it is one part of this chip that feels a little cheap. Some flux at each hole would go a long way to make it much easier to solder. This chip is not quite as easy to use as an Arduino. There is no onboard voltage regulation and its only capable of handling 3.3V so DO NOT hook it straight up to anything with 5V and expect it to work. You will burn this chip out quickly if you use anything but 3.3V.
Check out the fritzing example as well as how I hooked my ESP8266 up below.
Connected to the breadboard:
An example all wired up.

This powerful little IoT is completely Arduino compatible. The easiest way to use this and power it is with a USB to Serial Converter. The CP2102 is a perfect example and can be found at Tayda Electronics here.
Then you can hook everything up. From the CP2102 you need to solder a jumper wire to the 3.3V hole.
Then wire from the CP2102 -> ESP8266 as follows.
CP2102 -> ESP8266
3.3V -> Positive Voltage Rail on Breadboard
RX -> TX
TX -> RX
Gnd -> Gnd Rail on Breadboard
Then you must attach the following pins on the ESP2866 as follows;
VCC and EN -> +3.3V
GND, GPIO15, GPIO0 -> GND
In this Fritzing Diagram I have GPIO5 to an LED that is wired just to make sure everything is working.

To make everything Arduino Compatible you need to download the ESP8266 Board to via the Boards Manager. In Arduino IDE version > 1.6.8 you can go to Preferences -> Board Manager. Then enter this linke 'http://arduino.esp8266.com/stable/package_esp8266com_index.json' in to the Additional Board Manager URL's and hit Ok. Then open Tools -> Board -> Board Manager and search for 'ESP8266' and Install the ESP8266 board for Arduino. Once that is complete you should reopen Tools -> Board and double check that ESP8266 Modules is listed with a few ESP8266 board options below it.
Now the code to make the LED blink is shown below.
Now the next step will be to blink the LED over the web. Here is a quick script that will allow you to blink the LED from a web browser. The SSID is your network that the ESP8266 will connect to. While the password is the password to that network.
With this you should be adding to the world of the IoT in no time. Take this to the next step! What can you build with the ESP8266? Share your ESP8266 creation with us at Tayda Kits! My plan is to add a tracker to my office door so I know when someone walks into my office (hopefully its not often that someone walks in that is not me!).
I must try this. Thanks for sharing.
I must too